Temperature and Humidity Monitoring using Blynk
In this tutorial, w are going to Monitoring Temperature and Humidity using DHT11 and send the Data to cloud using Blynk
Components Required for this Tutorial:
ESP8266 – 01 WiFi Module
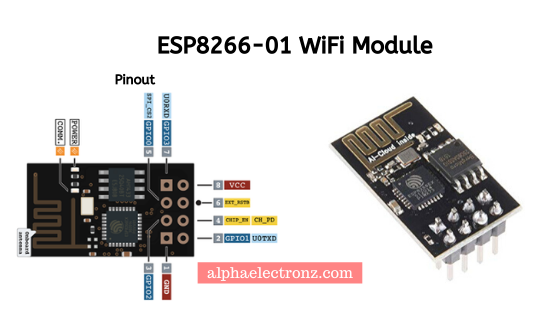
ESP8266-01 WiFi Module
ESP8266-01 is a Serial WiFi Transmitter and Receiver which can give any Micro-controller access to WiFi Network.
The ESP8266 module is of low cost and comes pre-programmed with an AT command set firmware, meaning, you can simply hook this up to your Arduino device and get about as much WiFi-ability as a WiFi Shield offers. This module has a powerful on-board processing and storage capability that allows it to be integrated with the sensors and other application through its GPIOs.
Features :
- Wi-Fi Direct (P2P), soft-AP
- Integrated TCP/IP protocol stack
- It features an integrated TR switch, balun, LNA, power amplifier and matching network
- Equips integrated PLL, regulators, DCXO and power management units
- Integrated low power 32-bit CPU could be used as an application processor
- SDIO 1.1 / 2.0, SPI, UART
- STBC, 1×1 MIMO, 2×1 MIMO
- A-MPDU & A-MSDU aggregation & 0.4ms guard interval
- Wake up and transmit packets in < 2ms
- Standby power consumption of < 1.0mW (DTIM3)
DHT11 Temperature and Humidity Sensor
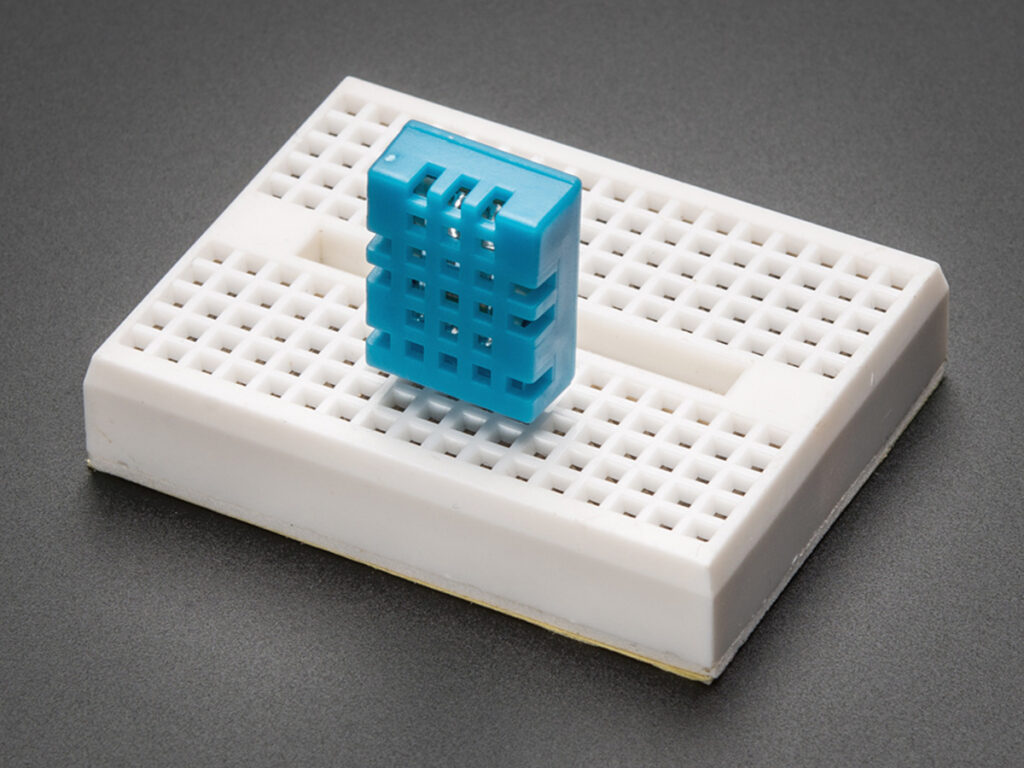
DHT11 Temperature and Humidity Sensor
The DHT11 is a basic, ultra low-cost digital temperature and humidity sensor. It uses a capacitive humidity sensor and a thermistor to measure the surrounding air and spits out a digital signal on the data pin (no analogue input pins needed). Its fairly simple to use, but requires careful timing to grab data.
The only real downside of this sensor is you can only get new data from it once every 2 seconds, so when using our library, sensor readings can be up to 2 seconds old.
TECHNICAL DETAILS
- Low cost
- 3 to 5V power and I/O
- 2.5mA max current use during conversion (while requesting data)
- Good for 20-80% humidity readings with 5% accuracy
- Good for 0-50°C temperature readings ±2°C accuracy
- No more than 1 Hz sampling rate (once every second)
- Body size 15.5mm x 12mm x 5.5mm
- 4 pins with 0.1″ spacing
Circuit Diagram
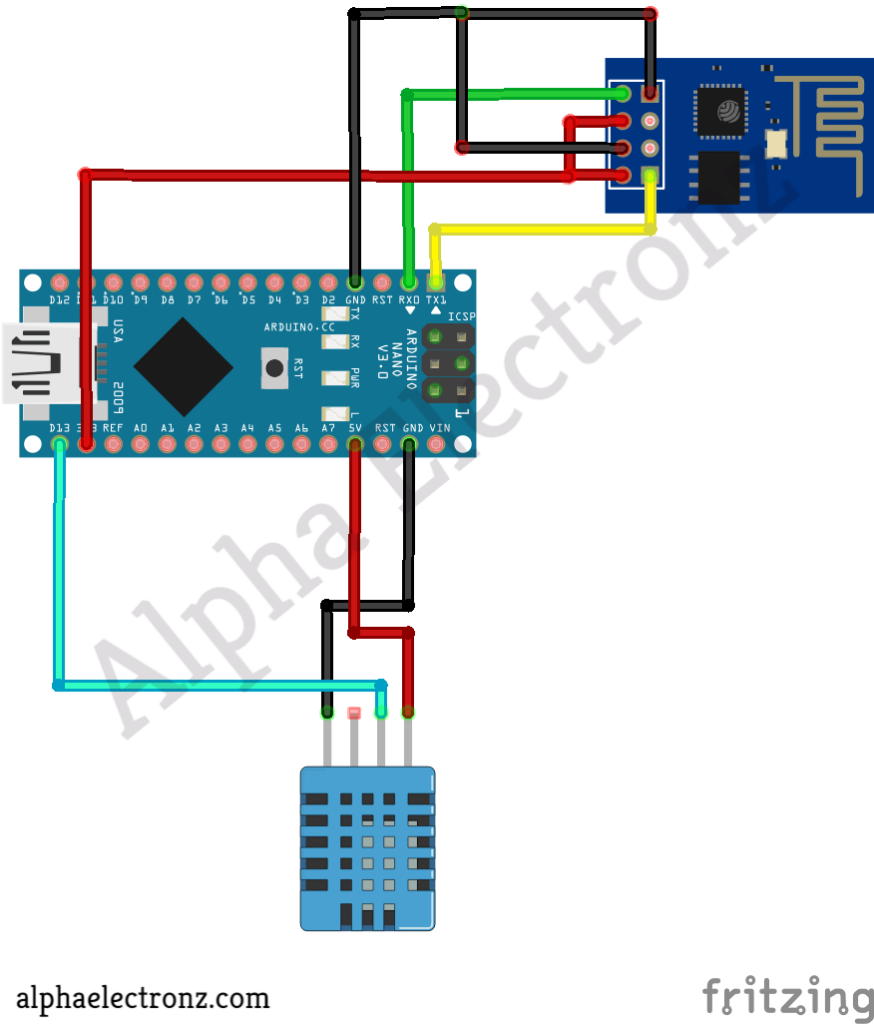
Circuit Temperature and Humidity Monitoring
The above Circuit Diagram shows the connection between Arduino Nano, ESP-01 and DHT11 Temperature and Humidity Sensor.
You can download the Fritzing File Here
Configuration Blynk App
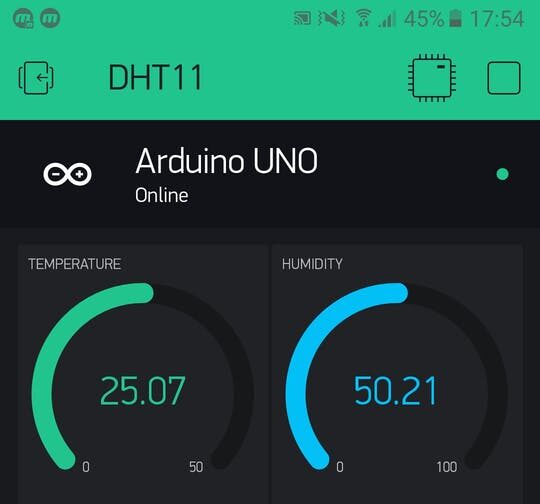
Now, let’s set up your Blynk App to receive data of Temperature and Humidity on Graphs.
Steps :
In the widget, Box find Gauges, one for Temperature and second for Humidity.
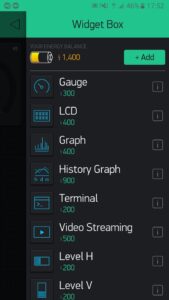
Gauges in Widget Box
Setup for Temperature Widget.
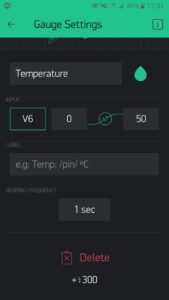
Temperature Widget Setup
Setup for Humidity Widget.
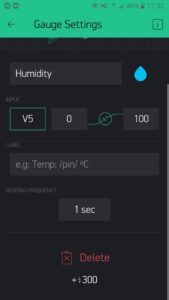
Setup for Humidity Widget
Now upload the Code and Play.
Code
#define BLYNK_PRINT Serial
#include <ESP8266_Lib.h>
#include <BlynkSimpleShieldEsp8266.h>
#include <SimpleDHT.h>

char auth[] = "Paste Your Authorization Code Here";

char ssid[] = "Paste your WiFi Name Here";
char pass[] = "Paste Your WiFi Password Here";

// Your ESP8266 baud rate:
#define ESP8266_BAUD 9600
ESP8266 wifi(&Serial);

const int pinDHT11 = 13; // GPIO2 on your ESP8266 Wifi Module
SimpleDHT11 dht11;

void setup()
{
  Serial.begin(ESP8266_BAUD);
  delay(10);
  //Set ESP8266 baud rate
  // EspSerial.begin(ESP8266_BAUD);
  delay(10);
  Blynk.begin(auth, wifi, ssid, pass);
}

void sendSensor()
{
  // start working...
  Serial.println("=================================");
  Serial.println("Sample DHT11...");

  // read without samples.
  byte temperature = 0;
  byte humidity = 0;
  int err = SimpleDHTErrSuccess;
  if ((err = dht11.read(pinDHT11, &temperature, &humidity, NULL)) != SimpleDHTErrSuccess) {
    Serial.print("Read DHT11 failed, err="); Serial.println(err); delay(1000);
    return;
  }
  // for debug purposes.
  Serial.print("Sample OK: ");
  Serial.print((int)temperature); Serial.print(" *C, ");
  Serial.print((int)humidity); Serial.println(" H");
  // DHT11 sampling rate is 1HZ.
  delay(1000);
  Blynk.virtualWrite(V6, temperature);
  Blynk.virtualWrite(V5, humidity);
}

void loop()
{
  sendSensor();
  Blynk.run();
}
Now upload the code and wait for ESP 01 to connect with Blynk and then press the Play button.
Video Tutorial