BOINC (Berkeley Open Infrastructure for Network Computing)!
BOINC is a platform that allows individuals to donate their idle computer time to scientific research projects. By participating in BOINC, you can contribute to very important research in fields such as biology, physics, astronomy, medicine, and more, simply by running a program on your Raspberry Pi.
BOINC is easy to use and completely free, and you can choose which projects you want to support. Whether you have a powerful gaming rig or a simple laptop, you can make a difference by joining BOINC and lending your computing power to important research.
BOINC (Berkeley Open Infrastructure for Network Computing) can be used on a Raspberry Pi to donate idle computing power to scientific research projects. The Raspberry Pi is a small, low-cost computer popular for education, home media centres, and DIY projects. By running BOINC on a Raspberry Pi, you can contribute to necessary research in fields such as biology, physics, medicine and astronomy, while also learning more about the Raspberry Pi and computer programming.
To use BOINC on a Raspberry Pi, you will need to install the BOINC client software and select the research projects that you want to support. You can choose from a wide variety of projects that are available through BOINC, and you can adjust the number of resources that you allocate to each project.
Keep in mind that the Raspberry Pi has limited processing power compared to a desktop or laptop computer, so it may take longer for projects to complete on a Raspberry Pi. However, by running BOINC on a Raspberry Pi, you can still make a meaningful contribution to scientific research.
Thank you for joining us to support scientific research through BOINC. Together, we can make a real difference in the world!
To install the BOINC client on a Raspberry Pi, you will need to follow these steps:
-
Make sure that your Raspberry Pi is connected to the internet and that you have the latest version of Raspbian installed.
-
Open a terminal window on your Raspberry Pi and enter the following command to update your package list:
sudo apt-get update -
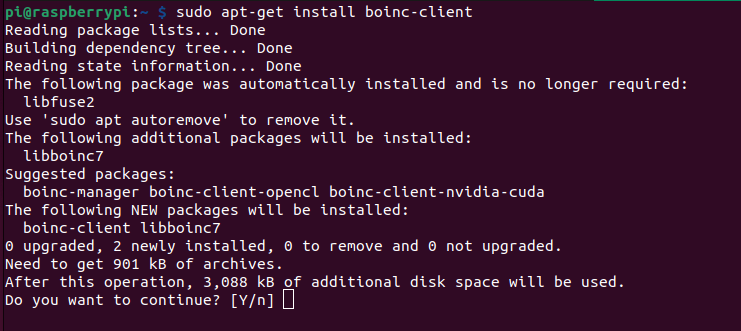
Install the BOINC client by entering the following command:
sudo apt-get install boinc-client -
After the installation is complete, start the BOINC daemon:
sudo systemctl start boinc-client -
Enable the BOINC daemon to start automatically at boot:
sudo systemctl enable boinc-client -
Restart the BOINC daemon to make sure it’s running without any problem:
sudo systemctl restart boinc-client


Configure BOINC Client for Remote Access
Most people are using their Raspberry Pi as a headless device without any monitor. Hence we won’t install the BONIC manager on Raspberry Pi, instead, we will install it on a Linux/Windows PC and access the client remotely from your PC.
-
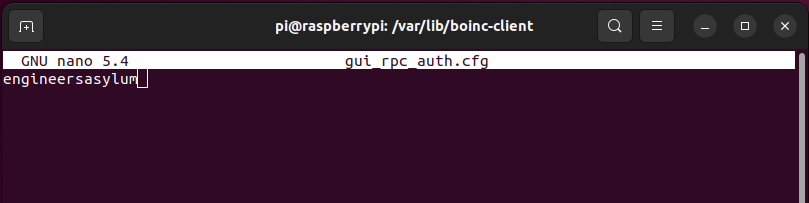
For accessing the client securely we have to configure a password for the BOINC client. To set the password for the client edit the gui_rpc_auth.cfg file in the /var/lib/boinc-client directory. I have set my password to engineersasylum.
-
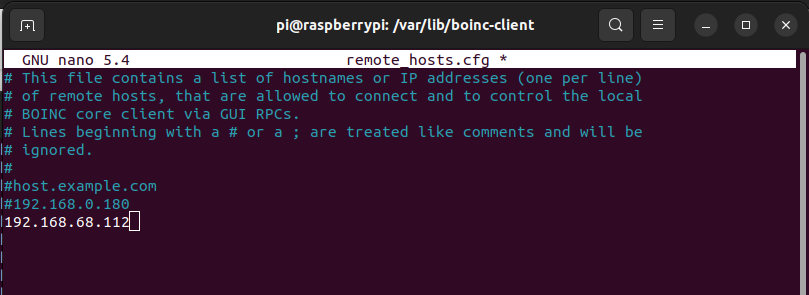
Once that is done, edit the remote_hosts.cfg file in the same directory to whitelist the IP address of your desktop computer.
Note: The IP address in the above image belongs to my Desktop computer, not Raspberry Pi. Be very careful, or else remote access will fail.
-
Now you have to restart the daemon again by running
sudo systemctl restart boinc-client
Choose preferred research project on BOINC Manager on Windows/Linux
To install BOINC Manager on any Linux or Windows machine and remotely connect to your BOINC Raspberry Pi client, you can follow the steps below:
- Install BOINC Manager on the system where you want to control your BOINC Raspberry Pi client.
-
On Linux, you can use your package manager to install BOINC Manager. For example, on Ubuntu, you can use the following command:
sudo apt-get install boinc-manager -
On Windows, you can download the BOINC Manager installer from the BOINC berkeley website and run it to install the software.
-
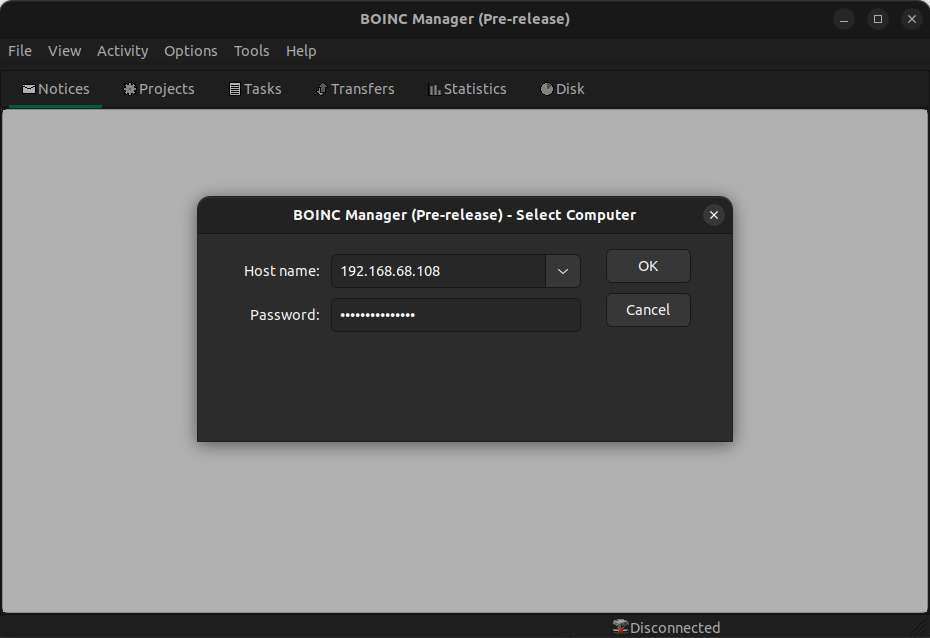
Start BOINC Manager and select View > Advanced View from the menu. In the Advanced View, select File > Select Computer. A new pop window opens where you have to provide the IP address of your Raspberry Pi and the same password we assigned to the BOINC client earlier (Password: engineersasylum). Then click OK.
-
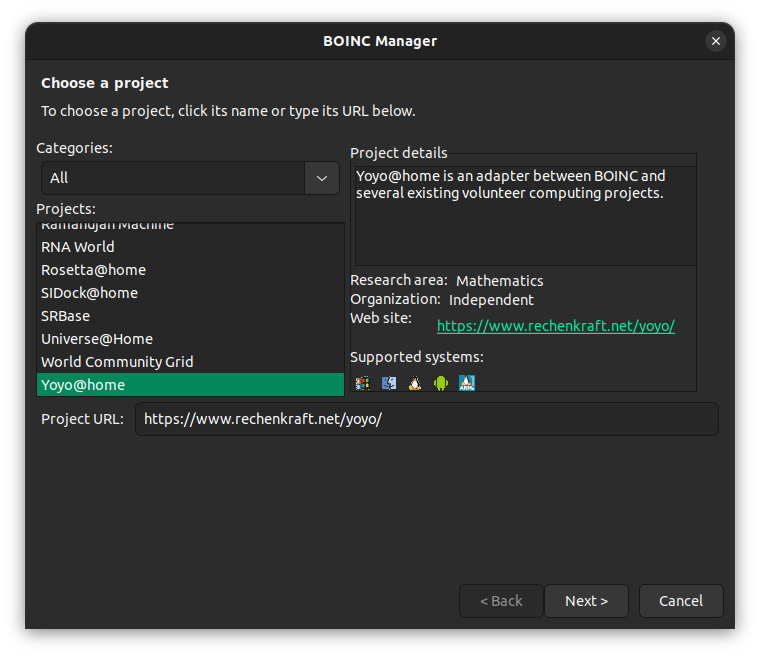
A new window will pop as in the image below, where you have to select your project/research with whom you like to share the computing power of your Raspberry Pi. I have selected Yoyo@home. Then Click Next.
-
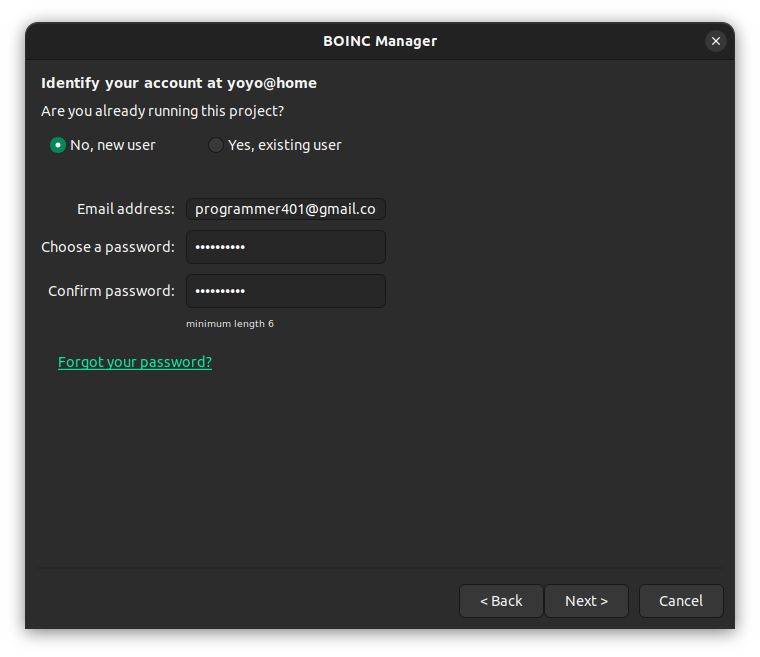
A new window will pop up where you have to create a new user account as in the below image. Click Next.
-
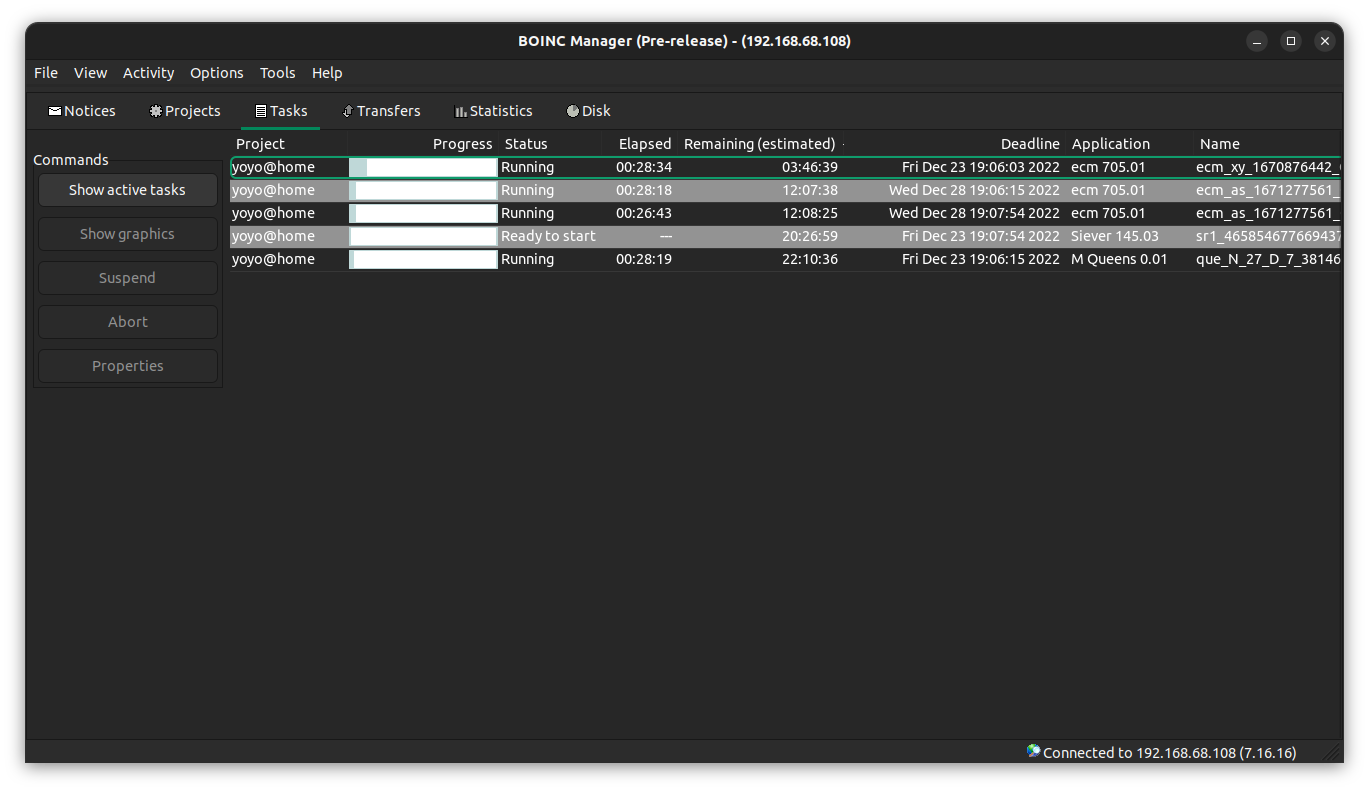
Done. Now, you can see that new tasks are being pulled from Project/Research server in the Tasks Window as in the below image. You are helping researchers now by sharing your Raspberry Pi computation power, for solving research problems .Congratulations! Now you have officially become a contributor to world-class research.
If you want to contribute to multiple projects, click “Add Project” and repeat the process until you’ve added all the projects you want to participate in.
Note: The Raspberry Pi won’t be able to support all the projects listed due to its limited capability. But there are several projects/research on the list you can choose for your Raspberry Pi. I am running Yoyo@home on my old Raspberry Pi 3 Model B+ with 1GB of RAM. My Raspberry Pi is still up and contributing, and I am not going to stop. So, If you guys have any queries then I can help. Please feel free to reply to this post by clicking the reply button and I will respond as soon as possible